Monday 28 February 2011

antique map home decor ideas

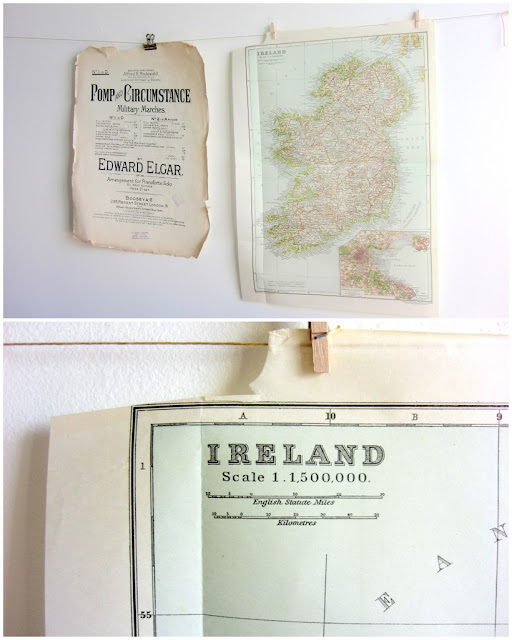
this week i will be adding more antique maps from the 1920's - these are ideal for framing and make really unique gifts.

here are some other home decor ideas using both vintage and modern maps -

                                   photo-source unknown
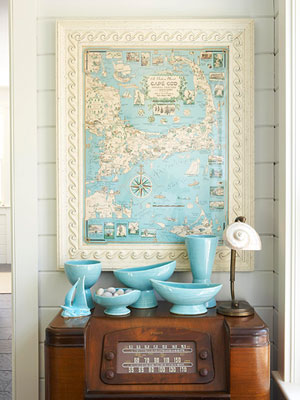
as a focal feature by incorporating ceramics in matching hues

                                                        photo from country living
you can *decoupage maps onto furniture

                                                                                      photo by hikinginstillettos blog

insert pieces of maps into the panelling in an internal door

                                                       photo by homedit
add map pieces to embroidery hoops for an unusual wall feature

                                       photo from purplehomes blog
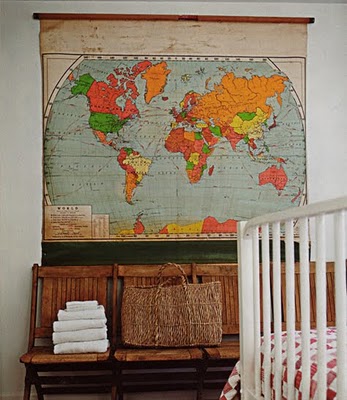
hang large maps unframed and team with vintage furniture

other ideas include
  • lampshades
  • coffee tables
  • bowls
  • cut pieces of map into butterflies, hearts and other shapes and display in a frame
  • cover notebooks for gifts
  • use maps for wrapping handmade soaps
  • photo frames
  • scrap booking and card making
  • gift wrapping
there are so many amazing things you can do with maps (if you know of any more please let me know!) although a simple map in a frame still looks great. click here for a useful 'how to' on framing maps.

* here is more info about decoupage and a simple 'how to' is available here

R x


sunday treasure hunt

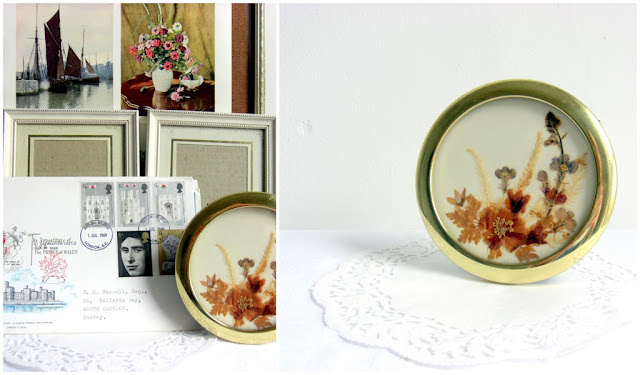
this weekend myself and my husband went to a local car boot. i wanted to find some frames to hang some pictures etc for a feature wall in my living room.and also some more vintage items for the shoppe

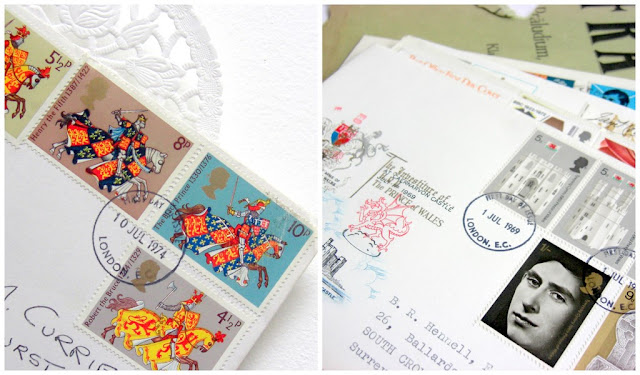
along with some bargain frames - i also came across this lovely handmade flower pressing - it's so sweet - i don't think i want to part with it! some other unique 'treasures' i found was some amazing stamp collecting ephemera -

i am thinking that i will keep these too for my feature wall. there are six in total and i got them for a bargain price of £3. i'm not exactly sure what these letters are - they look like they were sent out to stamp collectors to alert them of the new stamps available. look at Prince Charles on the right - doesn't he look young!

R x

ALL PICTURES -  MY OWN

Thursday 24 February 2011

feature walls & some of my dream items

this weekend, for my sins - i will be finishing stripping the dining room and repainting the walls and the ceiling. then i need to paint the fireplace, paint all the mahogany-esque furniture and re-fabric the cushions. after that i will be hanging the lovely chandelier my mum bought us for our wedding (long overdue as it was in 2009 but I didn't want to hang it till i have decorated - you don't put your earrings on before your LBD do you?!) then and only then can i concentrate on my dream wall feature. sadly all or most of these gorgeous items above will be sold on Etsy, but at least it will give me some inspiration to focus on during the decorating process.

 PHOTO FROM house to home

some ideas for creating a feature wall -
  • you can use objects as well as framed pictures
  • why not create a feature with some of your favourite paper ephemera,photos,postcards etc.. by pegging them to some string with miniature pegs
  • mismatched antique mirrors
  • create a 3D wall display collage of anything that takes your fancy from car boots, charity shops etc.
  • hang an embroidered rug, blanket or tapestry
  • empty frames look amazing as a feature display. also try hanging them with jewellery and other beautiful items pinned inside
  • other items you can pick up for your feature wall is sheet music covers, record label covers, old posters and maps
  • why not cover a whole wall with vintage pages from old encyclopedias and books


some tips for creating your display -
  • you do not have to use frames for your pictures - sometimes finding frames causes a delay in creating your wall, but why not just go without - it will still look just as good
  • if you are using frames, please do not overlook old / vintage frames. you can repaint them to suit you and often the oldest most shabbiest look the best. also you will often find old frames with their original contents such as vintage photos and paintings
  • the collage does not have to conform to any type of shape - unless the items are part of a set or all have the same theme then, they do tend to look better in a more structured display
  • you can try a small area first such as a cloakroom wall or above your bathroom sink
  •  be brave - if you like it then that's fine - it is your home after all!
  • if you are still not sure you can create a collage within a large shadow box or old drawers and hang that up, if you don't like it then it's only one item to take down

PHOTO FROM lonadeanna.blogspot.com 

TOP IMAGE COLLAGE CREDITS -top left drkennedyjones 
                                            top right maisonpaulette
                                            bottom left malcolmstudioshop
                                            bottom middle cabinetoftreasures
                                            bottom right theperfektionist

Wednesday 16 February 2011

decorating on a budget - anthropologie look for less


everybody loves Anthropologie don't they? but not everybody has their budget (i certainly do not). however all is not lost. i have found a really great website called fine craft guild and they have some fab tutorials for you to follow to 'anthro up your house' for less! i am hooked - i can't wait to try out the lettered drawers tutorial and it's even given me some ideas for my dining room - finally i am getting somewhere. did you see the fabric on the chair in the top picture? i am in love. take a look at the fine craft guilds article here

above pics all from Anthropologie

Tuesday 15 February 2011

peanut butter smoothie

oh yes, and stuff the calories - it's good for you , energy boosting and filling ;)

nice thing to look at - vintage botanical print

i love this vintage botanical print from The National Archives UK the colours are amazing and i also love it because it was illustrated aboard a ship in 1846 - i love ships.

PHOTO VIA FLICKR

Monday 14 February 2011

getting there & a lovely surprise

i am not quite sure why i didn't blog about this at the time as i was so excited!i was lucky enough, earlier this year to win a free ad space on the oh,hello friend blog - my all time favorite blog. i am sure you must have come across this amazing design blog before, but if you haven't here is a little info. it is run by the lovely Danni, a graphic designer based in California. aswell as running her blog she also has an etsy shop where she sells adorable jewellery. she is so incredibly talented and her posts are always amazingly creative and interesting.
it's so nice to actually win something especially something so unexpected. please go and take a look at here blog, you will surely be hooked :)

i am nearly there with the weddings page, i just need to list my new items to my shoppes (i am adding another eccomerce site soon but more on that later) and then i can create all of my links to purchase items. i am also going to be adding a page with lots of links to wedding d.i.y tutorials too. here is a link to the page but please be aware there is a long way to go so it doesn't look much yet!

Roseanna x

Sunday 13 February 2011

in progress

things are underway to launch my weddings page for tommorow. i thought it would be a good idea to launch it on valentines day - and this also gives me a deadline to work by which is something i am training myself to do. i decided that if i give myself deadlines i will get more things done this year.
anyway, this is a little sneek peek ....

Friday 11 February 2011

weekend tutorial - balloon birthday card

i wanted to share some card ideas with you by way of a tutorial.
i made a similar birthday card to this one recently for a friend and it is really simple to create. it incorporates vintage papers but you can really use whatever papers or card colours you like. i hope you enjoy it!

what you will need -
1. vintage papers from old books (or whatever style papers you like) i used a 1970's floral book page
2. some card about 4 x 4 inches (10 x 10 cms)
3. a piece of stiff card about 3 x 3 inches (7.5 x 7.5 cms)
4. 3D foam dots
5. double sided tape
6. 15 x 10cms card and a matching envelope
7. happy birthday text (see instructions below for details)
8. 3 different colours of cotton thread
9. scissors * please note you will also need some pva glue too

1. cut out a balloon shape from the stiff card about 4.5 x 3 cms in size
2. using the balloon shape as a template, draw 3 balloons onto your vintage paper - being careful to only draw on the side you do not want to show (ie. reverse side)
3.cut out your shapes and then apply some pva glue to the backs (reverse side) and then glue them onto the other piece of card
4. once dry cut out your balloon shapes from the card

5. cut out one length of about 30cms from each of your thread colours
6. take one of your balloon shapes and twist the end of the thread around the bottom of the balloon three times leaving a small length at the back of the balloon
7. apply the double sided tape to the back of the balloon making sure to cover all areas of the thread
8. turn your balloon over and check that there is no tape showing on the other side - repeat with the other 2 balloons using a different colour thread for each balloon

9. on your computer or if you have a typewriter, create some 'happy birthday' text. i have a typewriter so i did mine on that but if you want a similar font from the computer you can use courier or typical writer. use around a size 9 font and print it onto some thin card. cut it out about 5 x 1.5 cms. then cut out a 6 x 2cms piece of the vintage paper and stick the happy birthday text onto it with the double sided tape so you have a matted effect (you can also just use the text alone if you like)
10. lay your matted text piece and your balloons onto the card and decide how you would like them all to be positioned
11. apply 3 sticky foam dots onto the backs of the balloons and attach them to the card. then attach the text piece over the threads making sure to pull them slightly taught. once attached snip of the ends of the thread so that they finish at the bottom of the card.
12. i used a translucent envelope as i love the effect it creates once the card is inside. i got mine from here but if you are not in Europe you could use large glassine bags from here.

i hope you enjoyed my first tutorial - if you have any questions or comments please let me know and, have a great weekend :)

Wednesday 9 February 2011

vintage bags

i need a new bag for summer and have been looking on Etsy at some vintage bags. i came accross these. they are all nice and big as i always carry a lot of stuff. including, my full make up range (yes - two whole bags) usually my camera, purse, business cards, an old apple, tissues (my eyes always run when it's windy - and my nose) keys, my kindle - when i dare to take it out of the safety of the house, a few dried up tangerines, nuts - you may have noticed that i carry a lot of food , it's because i get panicky if i get hungry and there is no food at immediate use (this comes from being very well fed as a child) lots of old receipts and leaflets etc,painkillers,plasters,perfume and i think that is about it!

i love the style of these bags, they remind me of when i was a wee nipper at school and they have that 'school satchel' feel - which i like as i loved going to school. which one is your favourite?

TOP LEFT - stephanieD
TOP RIGHT - LittleBeeVintage
BOTTOM LEFT - zelda110
BOTTOM RIGHT - mellow mine